Tags
cross stitch, Download Free Hand Embroidery Tutorials, embroidery, hand embroidery, hand embroidery Dubai, hand embroidery for mens, Hand Embroidery Patterns, hand embroidery tutorials USA, handembrodery patchs for mens, handmade, handmade patterns uk, How to learn Hand Embroidery, latest hand made embroidery of pakistan, Learn Hand Embroidery Free, nautical, xstitch
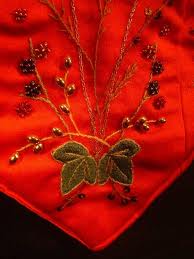
In the event that you have ever perused through a weaving book, particularly the vintage assortment, it can be a bit of overpowering when attempting to understand the distinctive sorts of fastens the examples may require. A portion of the fastens may appear to be excessively testing or maybe relentless, however fear not, hand weaving join are fun, and with training, can turn out to be very simple. We are going to learn you Hand Embroidery Tutorials with easy step by step.
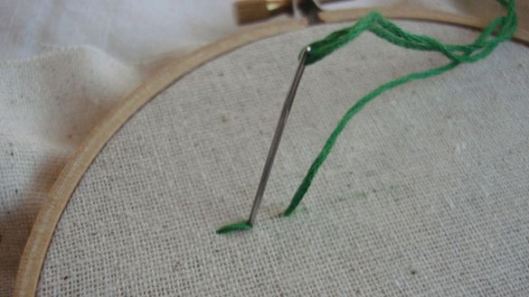
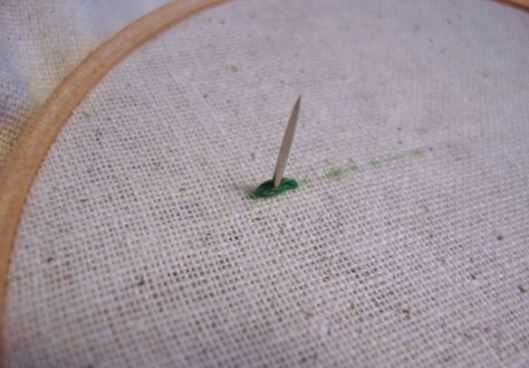
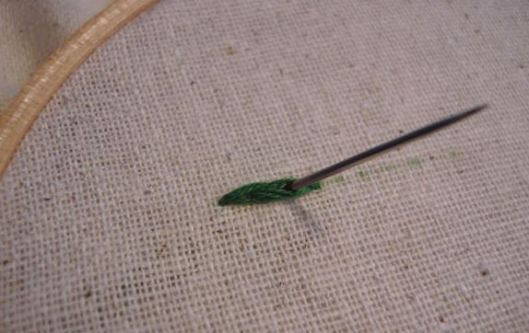
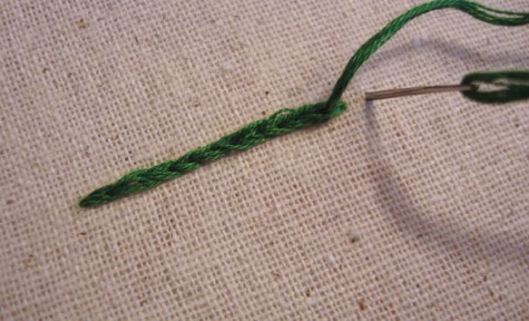
1. RUNNING STITCH
Running stitchComplete running join
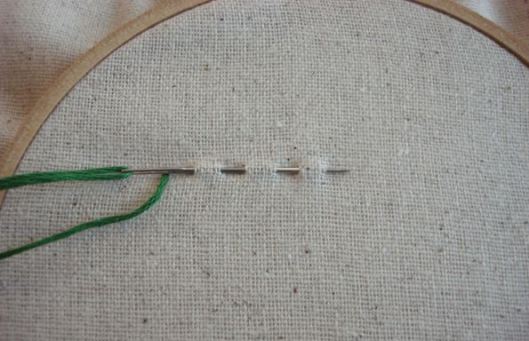
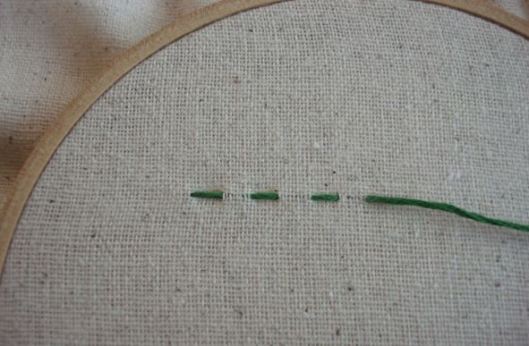
The running join is useful for laying out a weaving plan and is a brisk line to do. There are two approaches to do the running line: the primary strategy is like hand sewing and can be finished by driving the needle and floss in and over the texture in one consistent movement; the second technique can be truly driving the needle through the texture and pulling it go down. I have heard this called the “punch and jab” or “cutting” strategy.
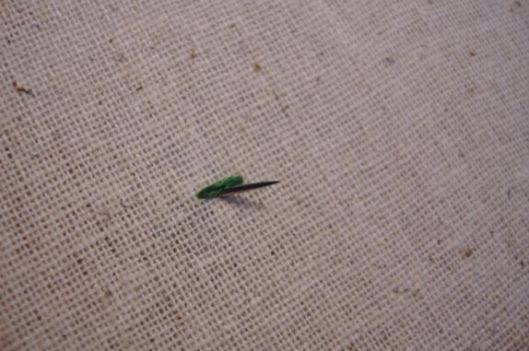
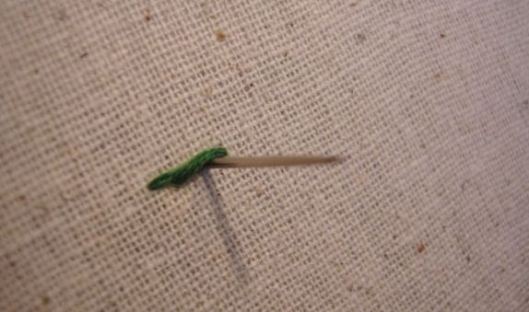
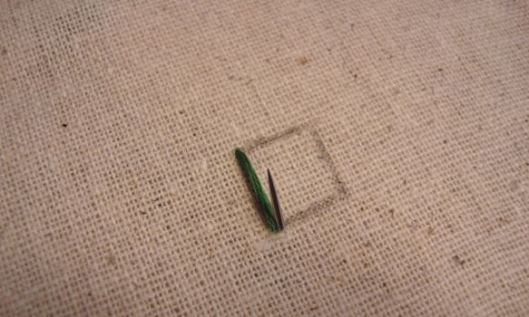
2. BACKSTITCH

BackstitchCompleted backstitch
Not at all like the running join, the backstitch makes a strong line and is useful for hand weaving content or delineating an outline. Start by pulling the needle and floss up through the texture and do one join forward. From underneath, space the needle out the length of your coveted join, pull up through the texture, and bring the needle and floss down through the finish of the past fasten.
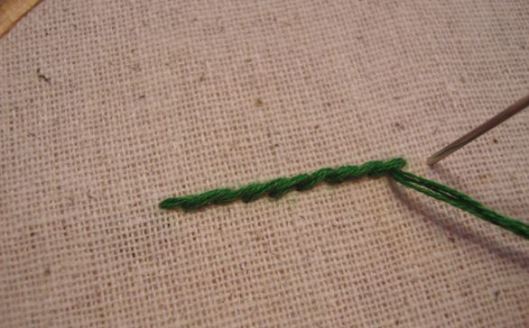
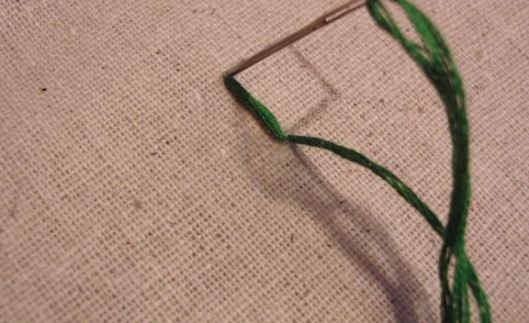
3. SPLIT STITCH
Starting a split stitchSplit stitchCompleted split fasten
Like the backstitch, the split fasten makes a strong line with an additional surface to it. This line is proper for content and diagram too, yet it likewise attempts to fill plans and make variety from the running or backstitch. To start, pull your needle and floss up through the texture and make one straight fasten. Your needle and floss ought to be on the underside of your band. Bring the needle up through the focal point of the line you just made and join forward an indistinguishable length from your underlying fasten. Rehash by bringing the needle up through the focal point of each join.
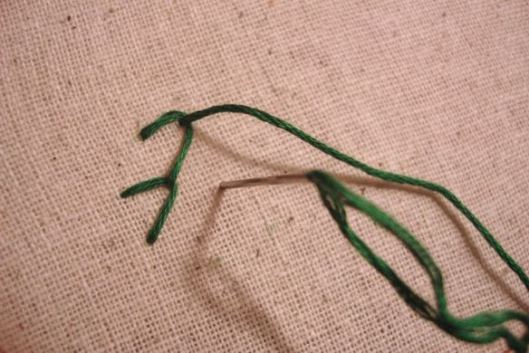
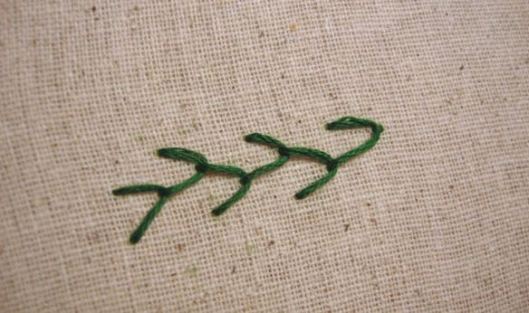
4. STEM STITCH
Starting stem stitchStem stitchCompleted stem join
The stem join got its name from being the regular line utilized for the stems of blooms or vines. I get a kick out of the chance to utilize this fasten for content since it can bend pleasantly with letters. Like the split fasten, you make one straight join forward and bring the needle and floss up underneath the texture, however as opposed to experiencing the focal point of this underlying line, you will convey the needle up just to the side of the line.
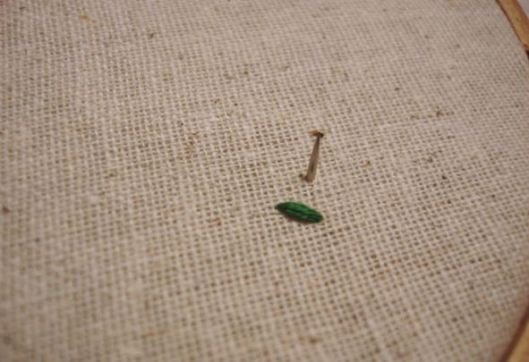
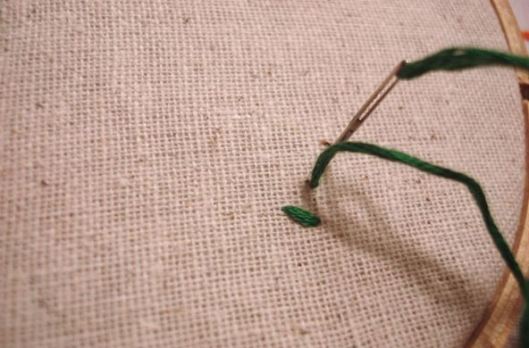
5. Glossy silk STITCH
Beginning a glossy silk stitchStitching a silk stitchThe glossy silk stitchCompleted glossy silk join.
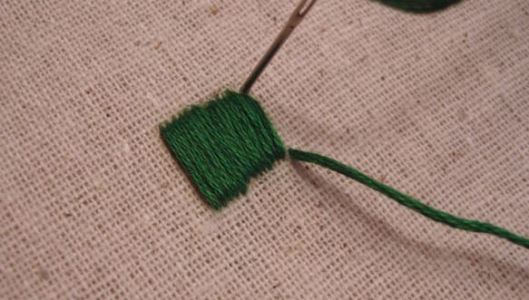
A decent filler line, the glossy silk join makes a smooth appearance. I get a kick out of the chance to utilize this join to fill in hearts or the leaves of blossoms. Take your needle and floss and make one fasten. Bring the needle up again only by the inverse side of the underlying line. Keep the fastens near each other, as required to fill the example or plan you are working with.
6. FRENCH KNOTS
Beginning french bunch lines Working to line french knotThe french bunch hand weaving stitchStitching a french knotSingle french knotMultiple finished french bunches

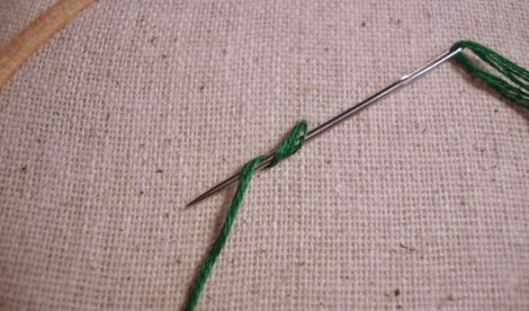
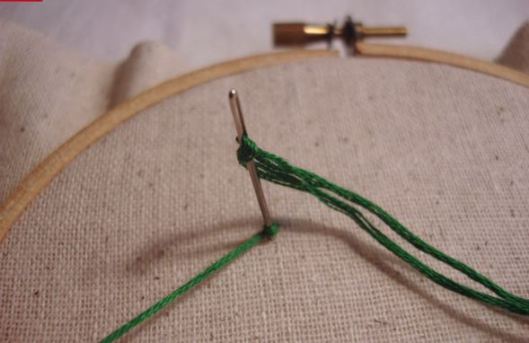
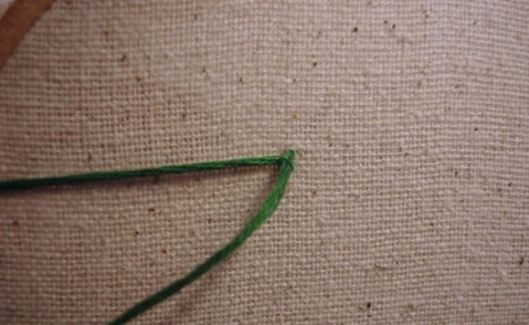
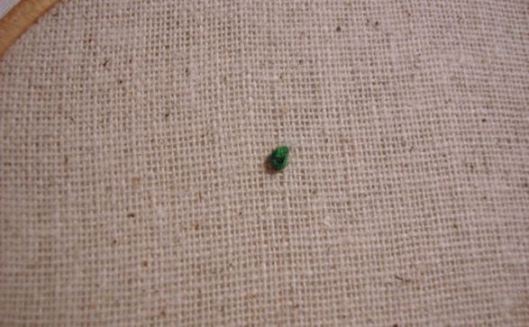
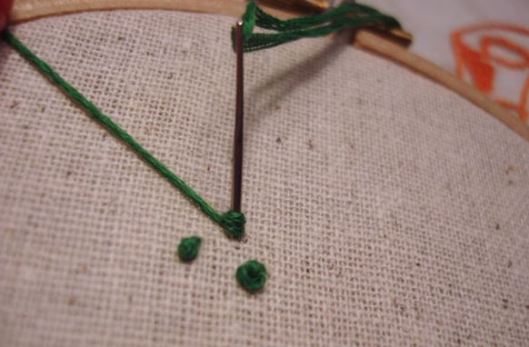
This is a most loved brightening join for practically everybody that I know. French Knots can be utilized to emphasize outlines or make fun fillers for generally plans. You’ll need to utilize two hands to make the French Knot by bringing the needle and floss up through the texture and wrapping the floss around the needle twice. Hold the finish of the floss rigid and cut the needle down only by the space where it turned out through. Continue holding the floss tight as you pull the needle through. You can differ the span of your French bunches by wrapping the floss around the needle anyplace in the vicinity of one and three times.
You may likewise make the most of our post 5 Foolproof Tips for French Knots.
7. CHAIN STITCH
Beginning a chain stitch-Beginning a chain stitchLoop for a chain stitchSecond “interface” in a hand weaved chain stitchStitching a hand weaved chain stitchMultiple connects in a hand weaved chain stitchCompleted arrangement of chain join

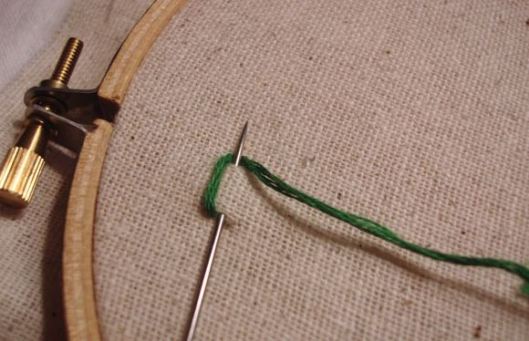
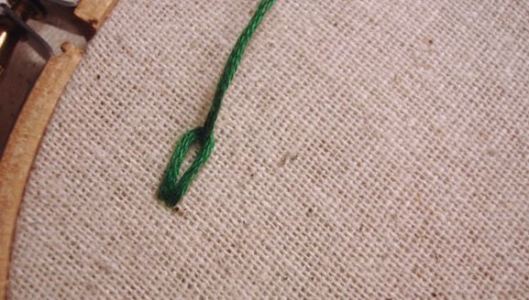
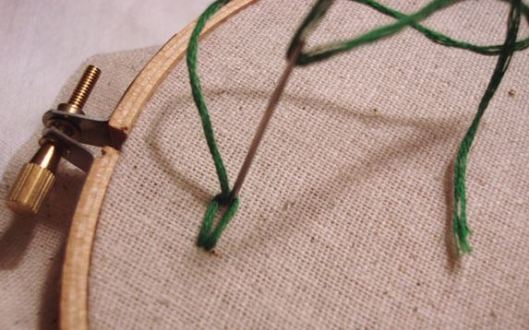
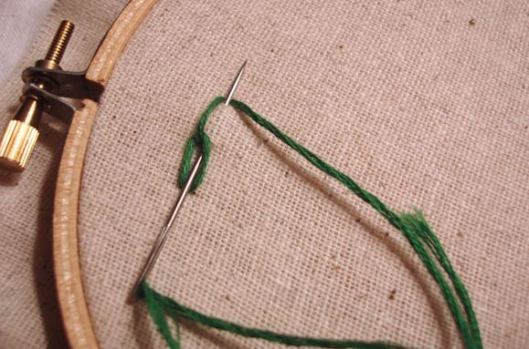
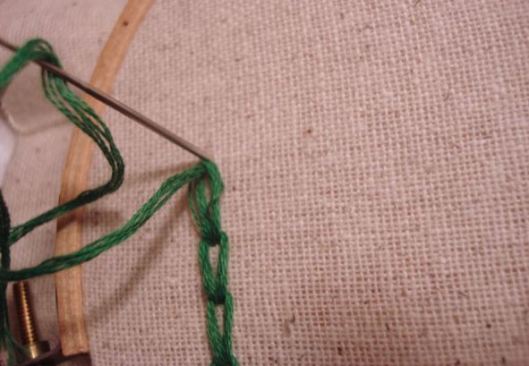
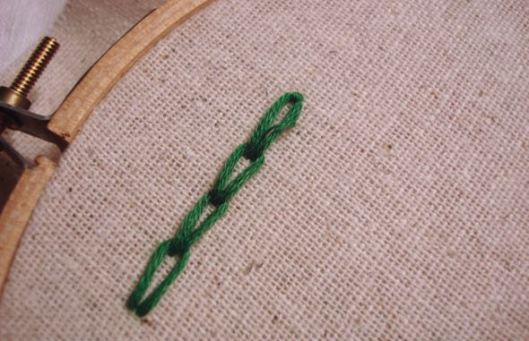
I used to figure I could never figure out how to do this join, at that point I attempted it, and now I cherish utilizing the chain line. It makes for an incredible framework line and in addition a casing for an example or outline. Take your needle and floss and make a join, however before you pull the floss completely through the texture, enable it to shape a circle. Bring the needle up through that circle keeping in mind the end goal to tie it from being pulled completely through the texture and force. Place the needle either specifically worse than broke you simply sewed, or near it, and draw through making another circle by not pulling the floss totally through the texture. Draw the needle up through the circle to tie it and force. Rehash the means to proceed with the chain. When you achieve the finish of the chain, just make a little fasten over the circle.
8. Sluggish DAISY

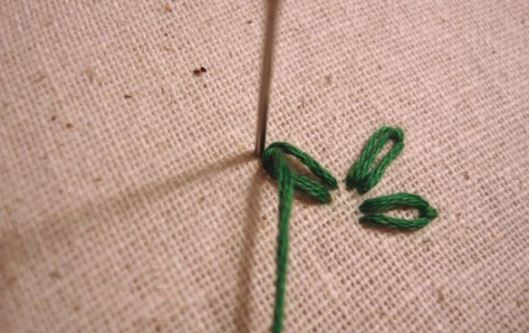
Beginning the sluggish daisy stitch The languid daisy hand weaving Completed stitch apathetic daisy join
This is a form of the bind fasten regularly alluded to as the “disconnected chain line” or “apathetic daisy.” Instead of proceeding with the chain, there is a little line made directly finished the finish of the circle to make what resembles a daisy petal. Much the same as the chain line, take your needle and floss and make a line, yet before you pull the floss completely through the texture, enable it to frame a circle. Bring the needle up through that circle keeping in mind the end goal to tie it from being pulled completely through the texture and make a little fasten over the highest point of the circle. Space out the following circle or utilize the fasten to make a daisy.
9. Quill STITCH
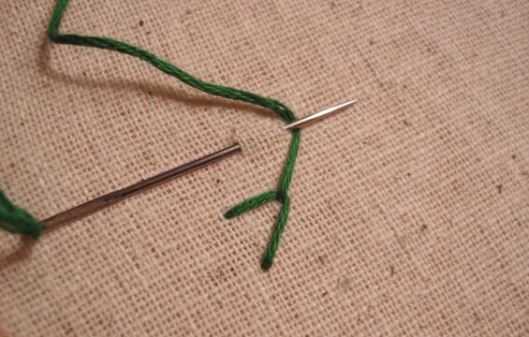
Beginning quill stitchWorking on a plume stitchCompleted plume fasten
Another variety of a chain join is the plume fasten. This fasten looks incredible as a casing or outskirt to a weaved piece. Like the chain join, you will utilize the second fasten to grapple the circle of the past line, however this line covers more space. Bring the needle and floss up through the texture and make a straight line, however don’t pull the floss completely through. Enable a circle to frame and bring the needle up through that circle. Space the following join over the other way from the past line. Make another circle by not enabling the floss to go totally through the texture. Force the needle up through the circle and rehash on the inverse side.
10. SEED STITCH
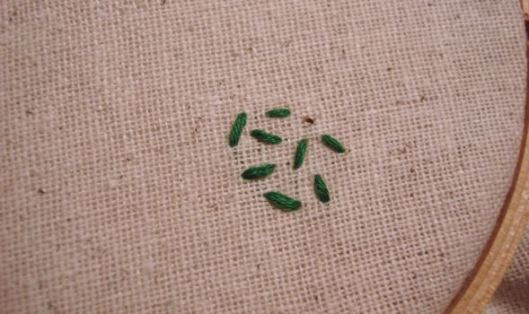
Beginning a seed stitchWorking on a hand weaving seed stitchCompleted hand weaving seed fastens
This is a decent filler fasten. Depending how close or far you space out your seed fasten, you can make a wide fill or layers of floss that seem to have measurement. Envision hurling the substance of a seed bundle into the air and watching the seeds fall arbitrarily on the ground. That same idea applies here. Bring the needle and floss up through the texture and make a straight line. Bring the needle and floss up through the texture again in an alternate edge. Proceed until the point that you have a filled region.
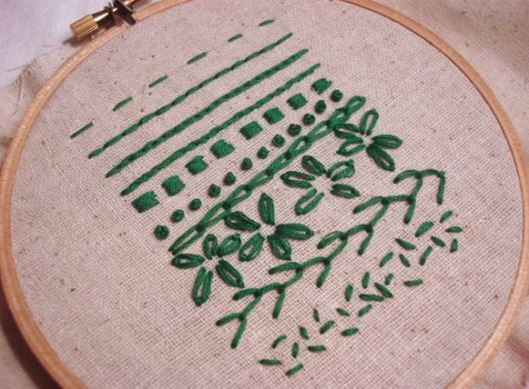
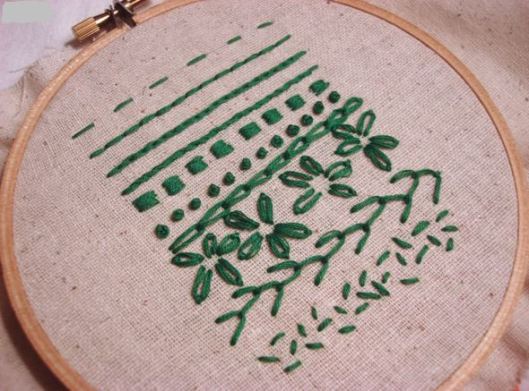
ten hand weaving join
These join not the slightest bit involve the totality of perfect hand weaving lines that exist, yet they are precisely what you have to kick you off. In the event that you are as of now a prepared embroiderer, possibly these will remind you to return to those old reliable fastens you might not have utilized as a part of a while. I had overlooked how much the affix join used to threaten me, however now, I’m so happy I attempted it since. it truly is a fun line.

 Embroidery has been dated to the Warring States period in China (5th-3rd century BC). The process used to tailor, patch, mend and reinforce cloth fostered the development of sewing techniques, and the decorative possibilities of sewing led to the art of embroidery. In a garment from Migration period Sweden, roughly 300–700 CE, the edges of bands of trimming are reinforced with running stitch, back stitch, stem stitch, tailor’s buttonhole stitch, and whipstitching, but it is uncertain whether this work simply reinforces the seams or should be interpreted as decorative embroidery.